- Install
- Basic operation
- Basics of programming for electronic work
- Basics of programming for Excel
- Machine learning with scikit-learn
- Visualizing data with matplotlib
- Web programming
- RPA programming
- Miscellaneous programming
- Reference
Object detection
By connecting a camera to an Arduino UNO Q, you can detect objects.
Wiring
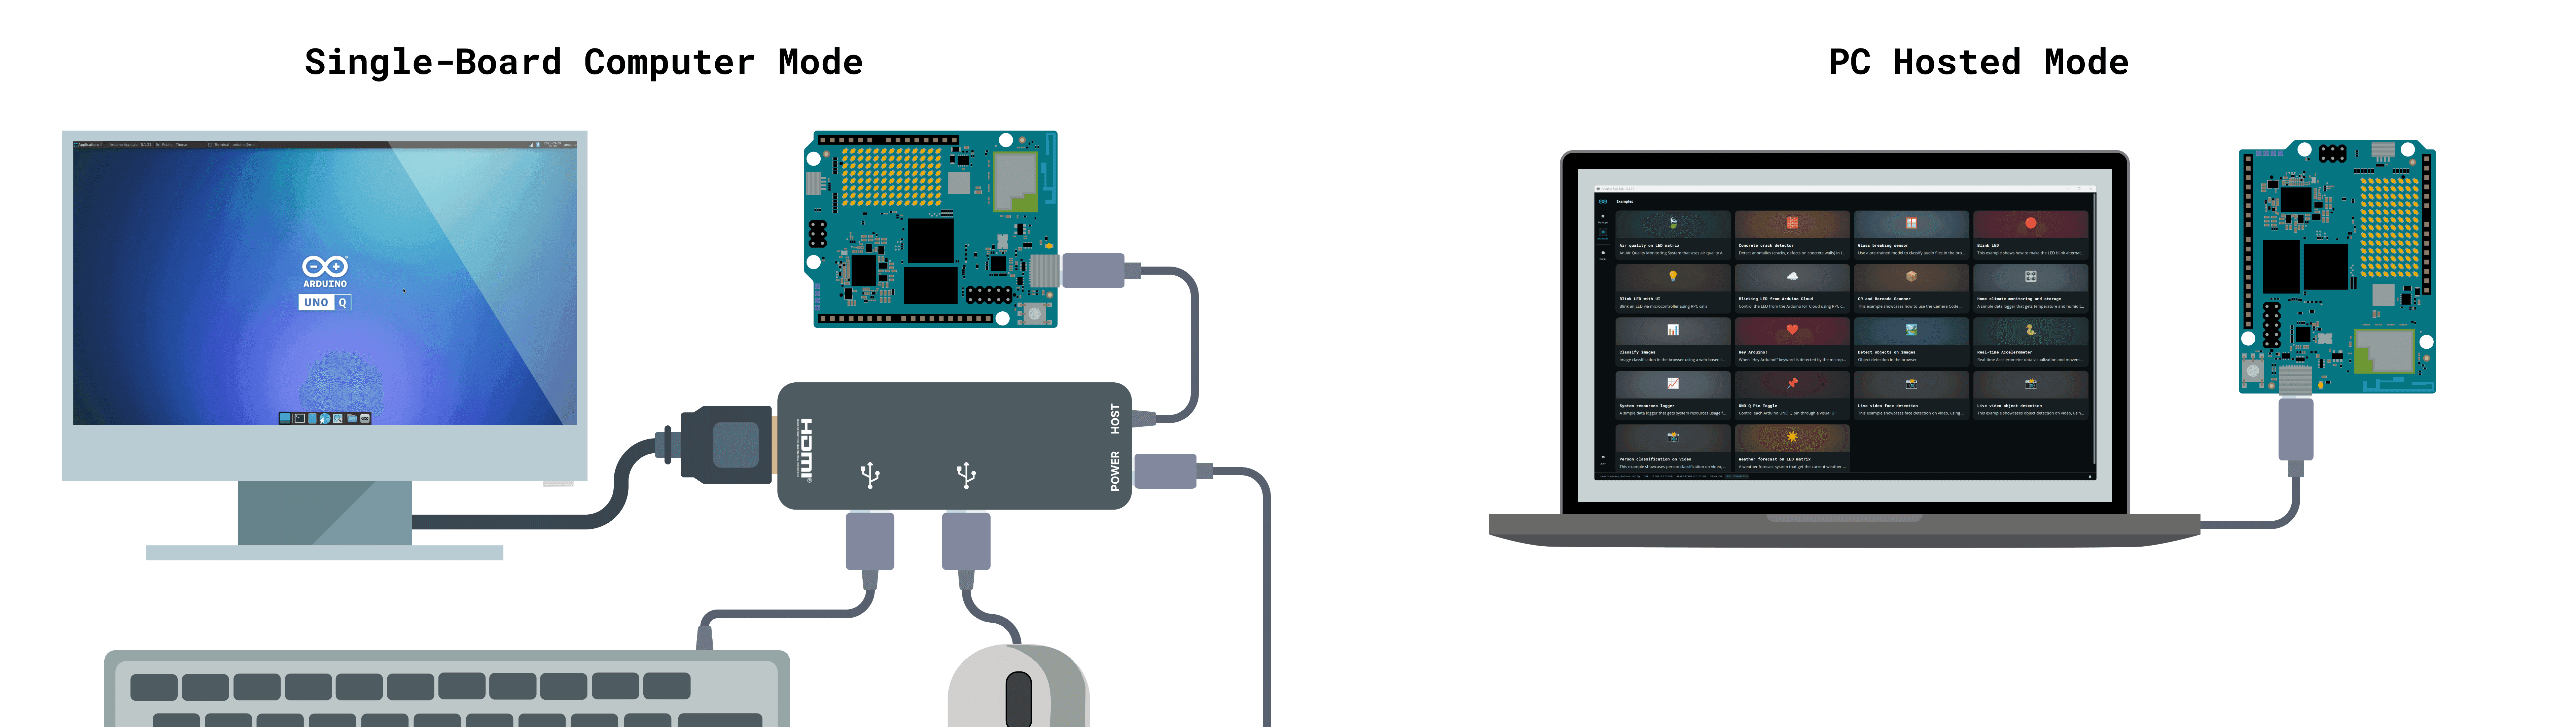
As shown in the image above under "Single Board Computer Mode," prepare a PD-compatible USB hub and connect a USB AC adapter and the Arduino UNO Q to it.
Next, connect the webcam (or a USB-connected video capture device and video camera) to the USB hub.
Adding a Brick
To use the object detection function, you need to add an object detection Brick to the firmware program.
Open the firmware program in Arduino App Lab and click the "Add Brick" button in the "Bricks" section in the upper left corner of the screen.
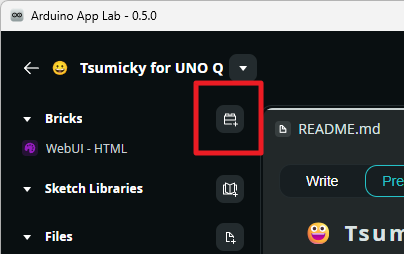
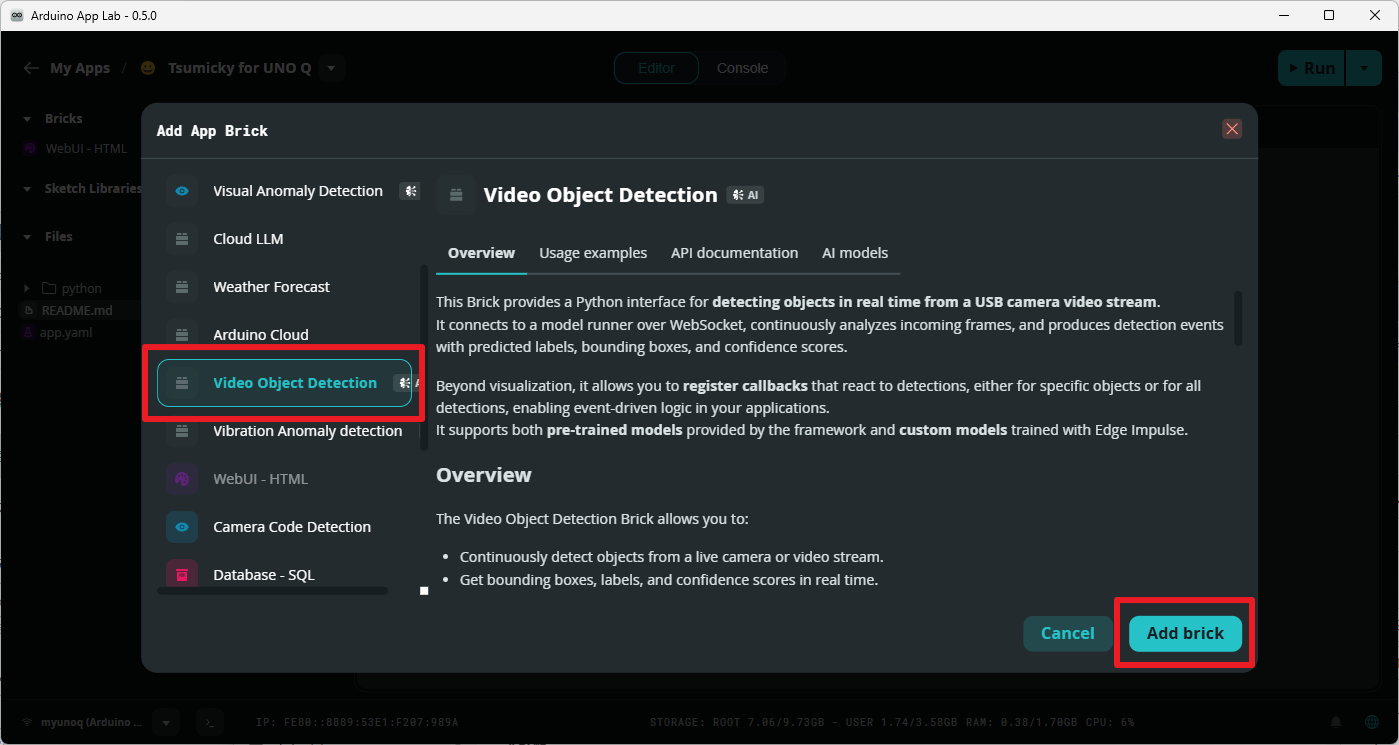
The "Add App Brick" dialog box will open.
Select "Video Object Detection" from the list of Bricks and click the "Add Brick" button.
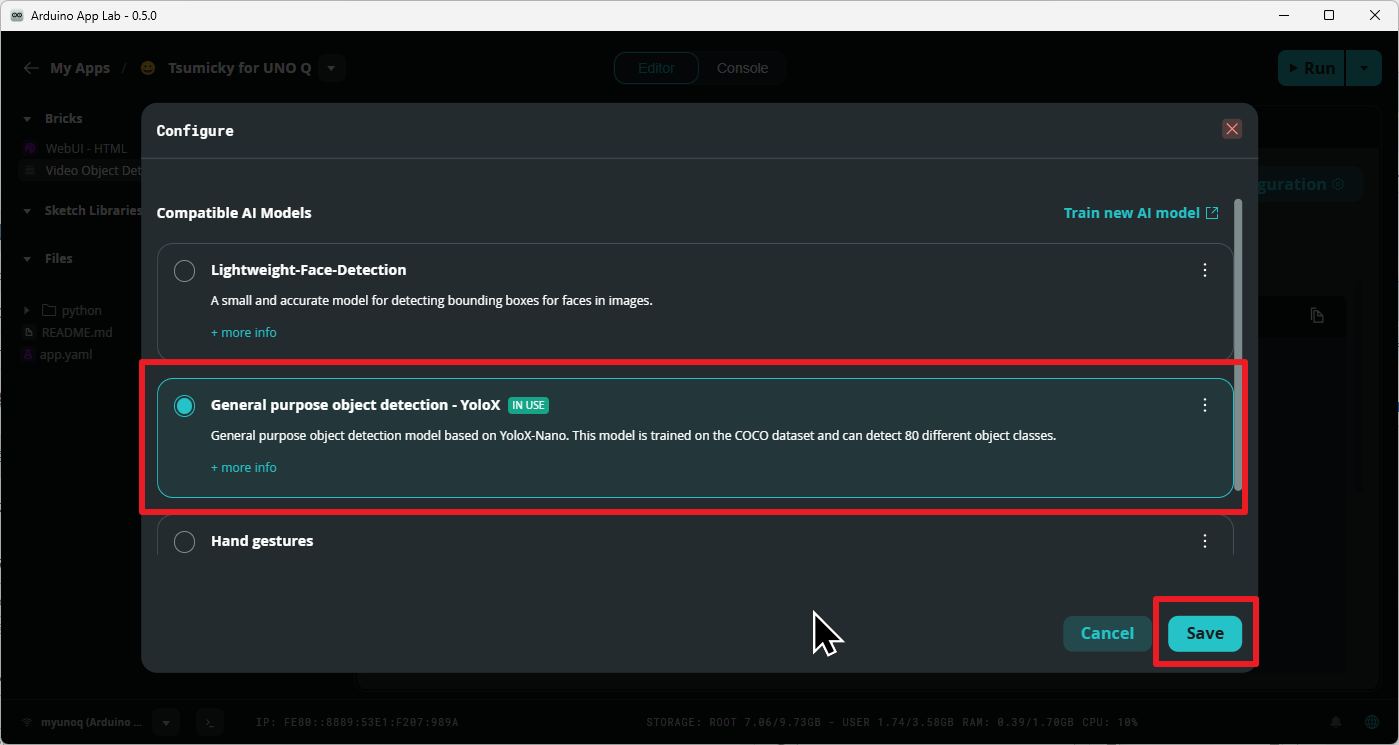
Next, the "Configure" dialog box will open, allowing you to select the type of Brick.
Select "General purpose object detection - YoloX" and click the "Save" button.
Clicking the "Save" button will display the "Success" dialog box.
Click the "x" button in the upper right corner to close the dialog box.
Note that if you try to start the firmware program after adding the Video Object Detection Brick without connecting a camera to the USB hub, you will get the error "missing required device: no camera found".
If you want to create a program that does not use a camera, you need to remove the Video Object Detection Brick from the firmware program.
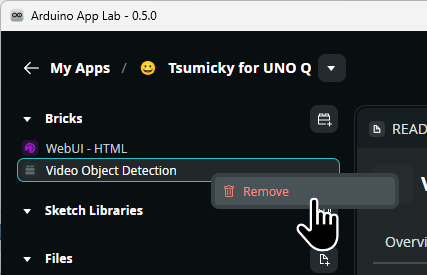
To delete a brick, open the firmware program, right-click the "Video Object Detection" brick in the brick list at the top left of the screen, and select "Remove" from the menu.
Basic Program Pattern for Detecting Multiple Types of Objects
Object detection can detect multiple types of objects simultaneously.
The basic program pattern for processing all of them is as follows:
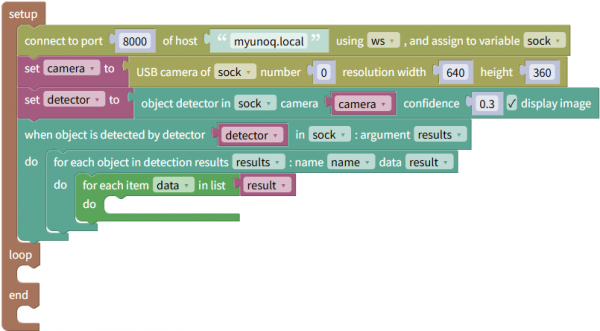
After connecting to the Arduino UNO Q, initialize the camera and assign it to a variable.
Next, initialize the detector. At this time, specify the camera variable that was initialized earlier as a parameter.
For the "confidence" parameter, specify a value between 0 and 1. Detection is only considered if the confidence level of the detected object exceeds the value of this parameter.
Checking the "display image" checkbox will open a pop-up window showing the camera's image.
The initialized detector is assigned to a variable.
Next, use the "When object is detected" block to create the process to be executed when an object is detected.
This block receives dictionary-type data, which is then received by the variable specified in the "Arguments" parameter.

Inside the "When object is detected" block, insert a "for each object in detection result" block to process each detected object sequentially.
The "name" parameter of this block specifies the variable to which the object's name (e.g., dog) will be assigned.
The "data" parameter specifies the variable to which the object's information will be assigned.

By repeating this information variable, you can obtain information about each individual object found.
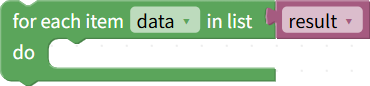
Within this iteration, you can handle the confidence level and coordinates of the found objects.


Basic program pattern for detecting specific types of objects
It is also possible to perform processing only when a specific type of object (e.g., dog) is detected.
The program pattern in that case would be as follows:
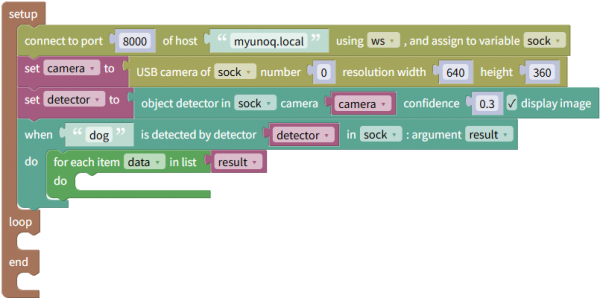
The process for initializing the detector is the same as when detecting multiple types of objects.
Next, use the "When XX is detected" block to create the processing to be performed when an object is detected.
The "Argument" parameter specifies the variable to which the information of the detected object will be assigned.

Then, by iterating through this information variable, we can obtain information about each individual object found.
Within this iteration, we can handle the confidence level and coordinates of the found objects.
Example
The following program is an example of detecting an object and displaying its name and confidence level.
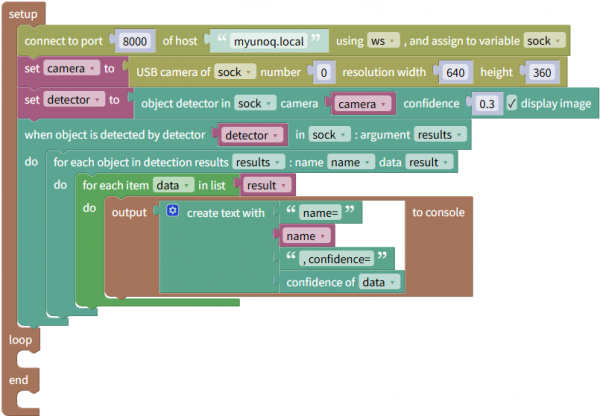
This program can be downloaded from here.