- Install
- Basic operation
- Basics of programming for electronic work
- Basics of programming for Excel
- Machine learning with scikit-learn
- Visualizing data with matplotlib
- Web programming
- RPA programming
- Miscellaneous programming
- Reference
Barcode / QR code detection
You can connect a video camera to an Arduino UNO Q to capture video and detect barcodes and QR codes contained within it.
Wiring
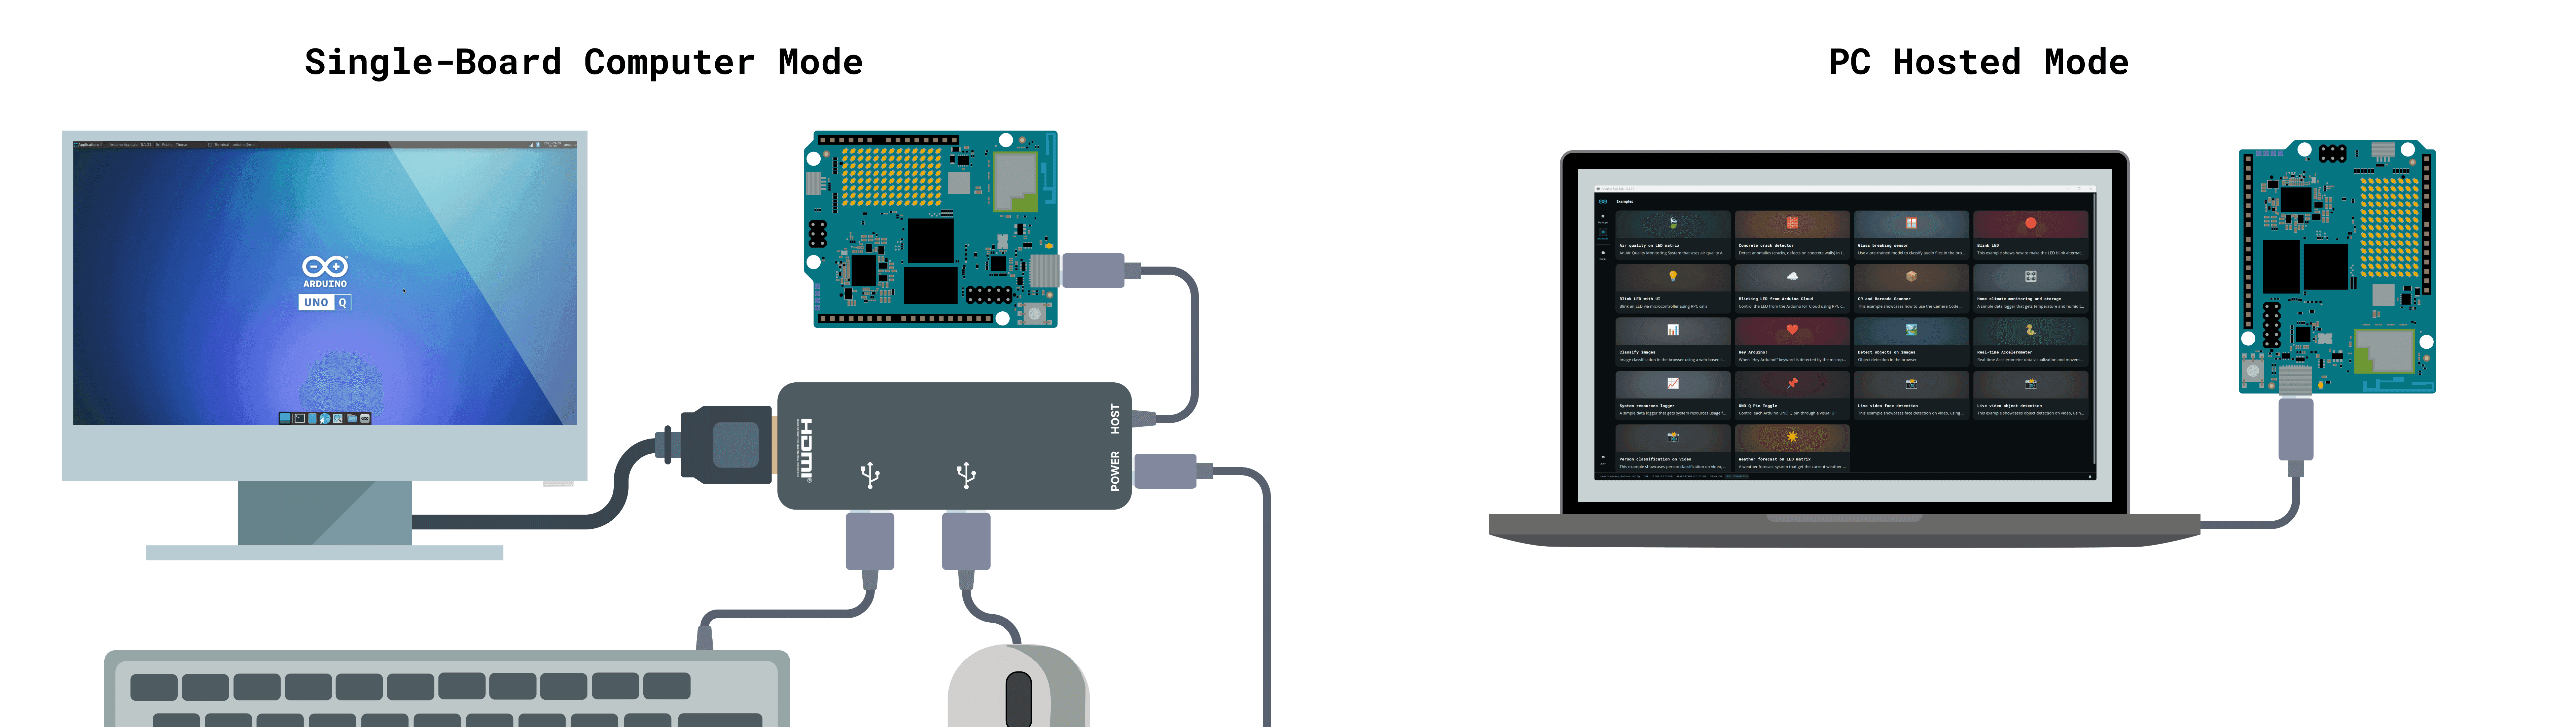
As shown in the image above under "Single Board Computer Mode," prepare a PD-compatible USB hub and connect a USB AC adapter and the Arduino UNO Q to it.
Next, connect the webcam (or a USB-connected video capture device and video camera) to the USB hub.
Add a brick
To use the code detection function, you need to add a code detection Brick to the firmware program.
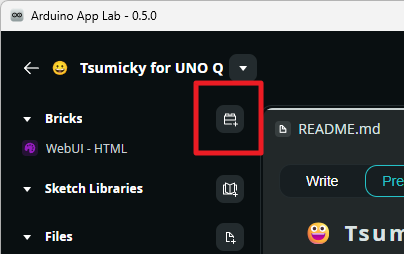
Open the firmware program in Arduino App Lab and click the "Add Brick" button in the "Bricks" section in the upper left corner of the screen.
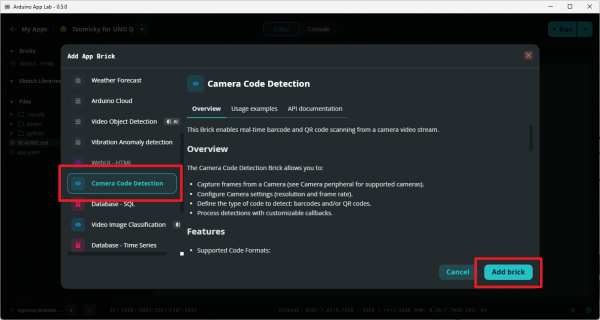
The "Add App Brick" dialog box will open.
Select "Camera Code Detection" from the list of Bricks and click the "Add Brick" button.
Clicking the "Add Brick" button will display the "Success" dialog box.
Click the "x" button in the upper right corner to close the dialog box.
Note that if you try to start the firmware program after adding the Camera Code Detection Brick without connecting a camera to the USB hub, you will get the error "missing required device: no camera found".
If you want to create a program that doesn't use the camera, you need to remove the Camera Code Detection brick from the firmware program.
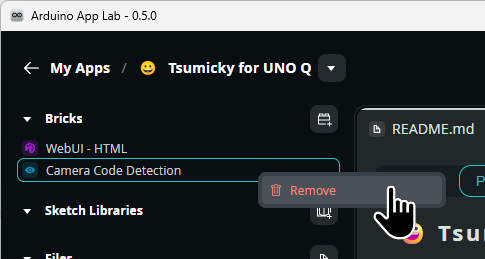
Open the firmware program, right-click on the "Camera Code Detection" brick in the brick list in the upper left corner of the screen, and select "Remove" from the menu to remove the brick.
Basic Program Pattern
The basic program for code detection follows the pattern below.
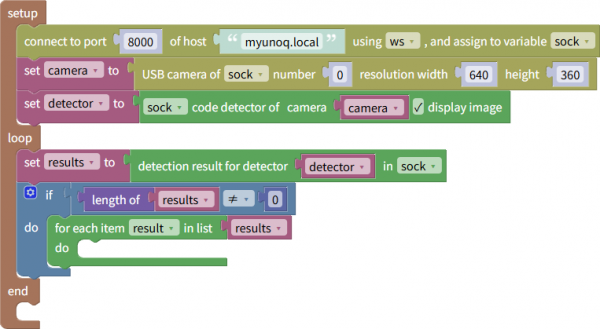
In the initialization section, after connecting to the Arduino UNO Q, the camera is initialized and assigned to a variable.
Next, the detector is initialized. At this time, the camera variable that was initialized earlier is specified as a parameter.
If the "Display Image" checkbox is checked during initialization, a pop-up window will open and display the camera's image.
Also, the initialized detector is assigned to a variable.
In the loop, the results detected by the detector are first assigned to variables.
The detected results are in the form of a list.
If a barcode or QR code is detected, a list containing the number of detected items is obtained.
Therefore, by checking whether the length of the list is non-zero, it is possible to determine whether a code has been detected.
If a code is detected, the process is carried out by repeatedly extracting each element from the list of detection results.
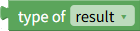
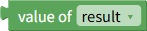
Within the loop, the type and value of the detected code can be obtained using type and value blocks.
Reset Detection Results
Once a code is detected, it is remembered until the program is terminated and will not be detected again.
To reset all detected states and return to a state where detection is possible again, use the "Reset All Detected States" block.

Also, if you want to reset only specific detection results, use the "Reset detected status" block.
Specify the string you want to reset in the string parameter.

Example
The following program is an example that detects barcodes and QR codes and displays the type of code and the string each time.
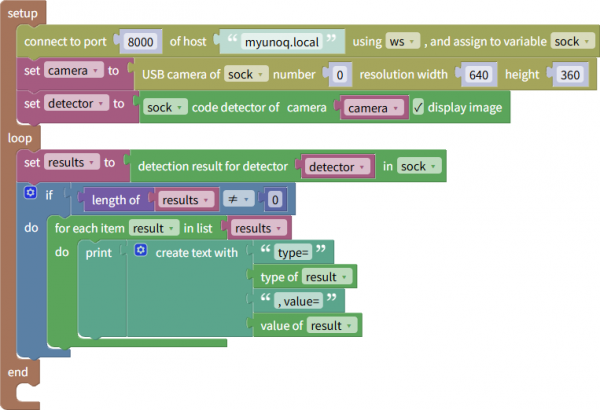
This program can be downloaded from here.