- Install
- Basic operation
- Basics of programming for electronic work
- Basics of programming for Excel
- Machine learning with scikit-learn
- Visualizing data with matplotlib
- Web programming
- RPA programming
- Miscellaneous programming
- Reference
Analog input
Analog input can be performed from the device connected to the microcontroller.
Analog input related blocks are in the "Basic I/O" group.
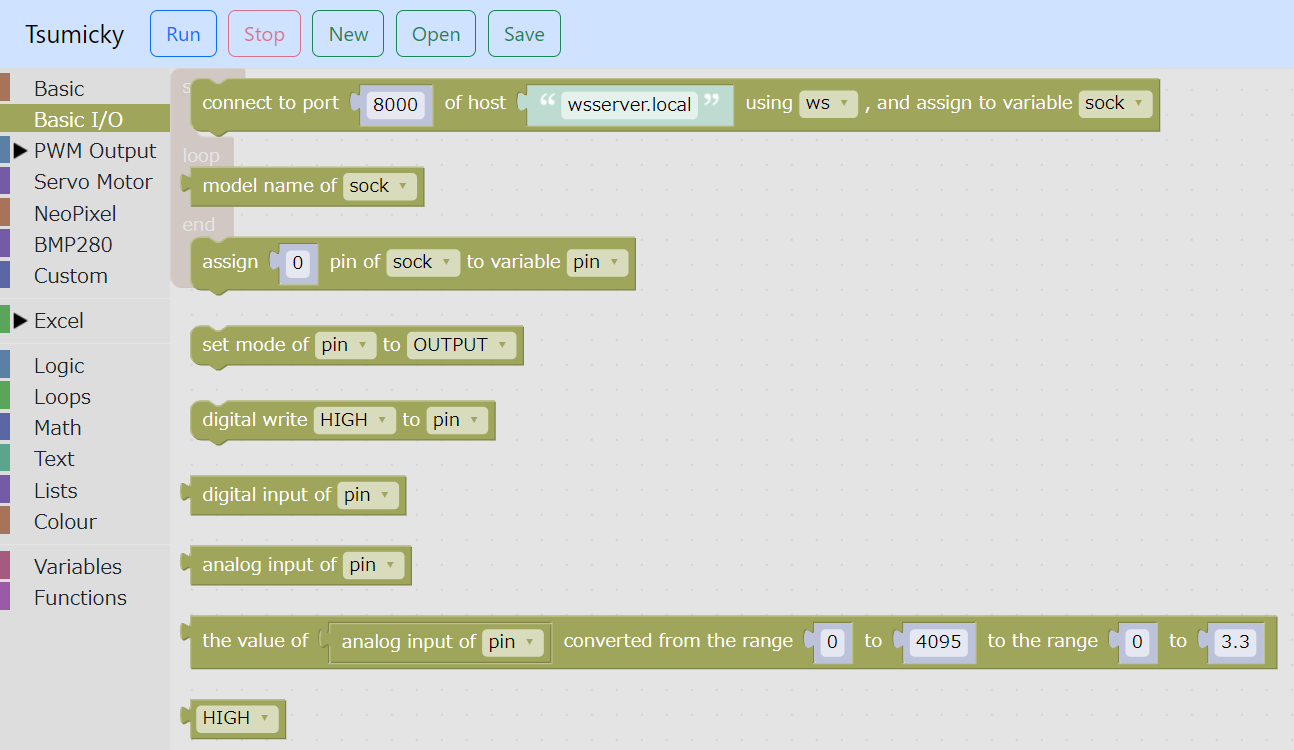
Assign pin to variable
First, use the block "Assign ... pin of ... to variable ..." to assign the output destination pin to a variable.

In the leftmost selection, select the variable to which the connected microcontroller is assigned.
In the center field, specify the pin number.
Then, in the rightmost selection, specify the variable to which you want to assign the pin.
Get analog input value
Next, use the "analog input of ..." block to obtain the analog input for that pin.

Under Choices, specify the variable to which you have assigned the pin.
Analog input can be obtained as a return value, so you can assign it to a variable or use it in an expression.
Also, the input value range is 0 to 4095.
If you want to convert the input value to voltage, use the range conversion block.

Example
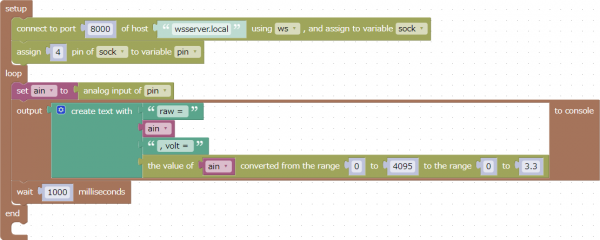
This is an example of reading the analog input value of pin 4 every second and displaying the raw value and the value converted to a range of 0 to 3.3V.
For example, if you connect a CdS cell and a resistor in series between 3.3V and GND and input the voltage value between the CdS cell and the resistor to pin 4, the value displayed depending on the light hitting the CdS cell will be It changes.
This sample program can be downloaded from here.
Restrictions
Raspberry Pi does not have analog inputs.
To perform analog input on Raspberry Pi, a separate A/D conversion module is required.