- Install
- Basic operation
- Basics of programming for electronic work
- Basics of programming for Excel
- Machine learning with scikit-learn
- Visualizing data with matplotlib
- Web programming
- RPA programming
- Miscellaneous programming
- Reference
PWM Output on Raspberry Pi Pico/PicoW
By using PWM output, you can gradually change the brightness of the LED.
This page explains how to output PWM on Raspberry Pi Pico/PicoW.
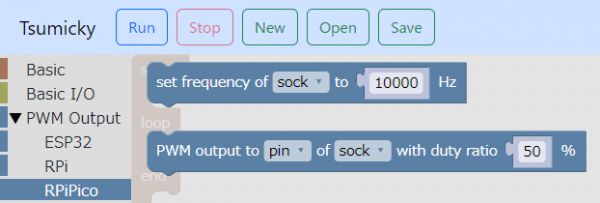
The PWM output related blocks of Raspberry Pico/PicoW are located in the "PWM output" - "RPiPico" group.
Frequency settings
First, set the PWM frequency in the "set frequency of ... to ...Hz" block.
On Raspberry Pi Pico/PicoW, the PWM frequency is the same on all pins.

Before using this block, it is necessary to assign a pin to a variable in advance using the "Assign pin XX of XX to variable XX" block in the "Basic Input/Output" group.
Perform PWM output
Next, use the block "PWM Output to ... of ... with a duty ratio of ...%" to perform PWM output.
Specify the duty ratio in the range of 0 to 100.

Example
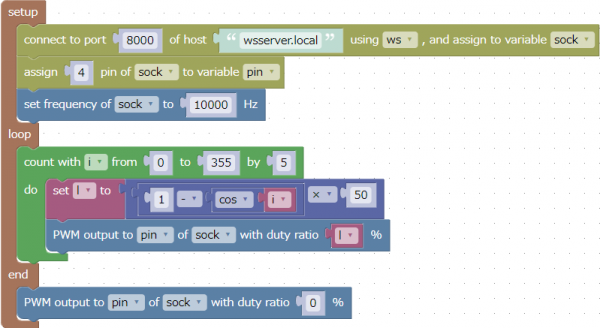
This is an example of PWM output to pin 4.
Increase or decrease the duty ratio between 0% and 100%.
If you connect an LED to pin 4, the LED will gradually become brighter and darker.
The program for Pico can be downloaded from here, and the program for Pico W can be downloaded from here.