- Install
- Basic operation
- Basics of programming for electronic work
- Basics of programming for Excel
- Machine learning with scikit-learn
- Visualizing data with matplotlib
- Web programming
- RPA programming
- Miscellaneous programming
- Reference
PWM Output on Raspberry Pi
By using PWM output, you can gradually change the brightness of the LED.
This page explains how to output PWM on Raspberry Pi.
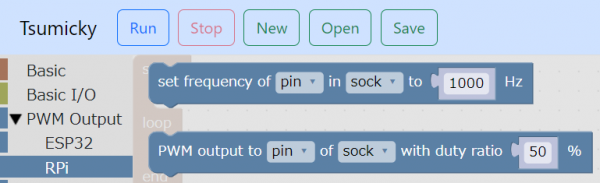
Raspberry Pi-based PWM output-related blocks are located in the "PWM output" - "RPi" group.
Frequency settings
First, set the PWM frequency for each pin in the "set frequency of ... in ... to ...Hz" block.

Before using this block, it is necessary to assign a pin to a variable in advance using the "Assign pin XX of XX to variable XX" block in the "Basic Input/Output" group.
Perform PWM output
Next, use the block "PWM output to ... of ... with duty ratio ...%" to perform PWM output.
Specify the duty ratio in the range of 0 to 100.

Example
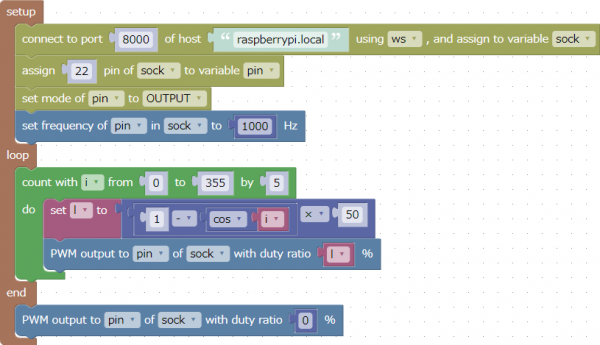
This is an example of PWM output to pin 22.
Increase or decrease the duty ratio between 0% and 100%.
If you connect an LED to pin 22, the LED will gradually become brighter and darker.
This program can be downloaded from here.