- Install
- Basic operation
- Basics of programming for electronic work
- Basics of programming for Excel
- Machine learning with scikit-learn
- Visualizing data with matplotlib
- Web programming
- RPA programming
- Miscellaneous programming
- Reference
Working with Forms
If a web page has an input form, you can change the content of each element in that form.
This page explains how to do this.
Text Input/Select Elements
You can programmatically change the text entered in text input elements (<input type="text"...> or textarea elements) or the item selected in a select element.
To do this, use the "Set XX value to XX" block.
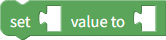
The "set XX value" parameter specifies the input element to be changed.
The "to XX" parameter specifies the new value.
For text input elements, specify the new value directly.
For select elements, specify the value attribute of the new item (option element).
Checkbox/Radio Button
You can change the checked state of a checkbox (<input type="checkbox"…>) or radio button (<input type="radio"…>) programmatically.
To do this, use the "Set the checked property of XX to XX" block.

The first "XX" parameter specifies the checkbox/radio button you want to change.
Click the last "to XX" parameter to check the target checkbox/radio button.
Example
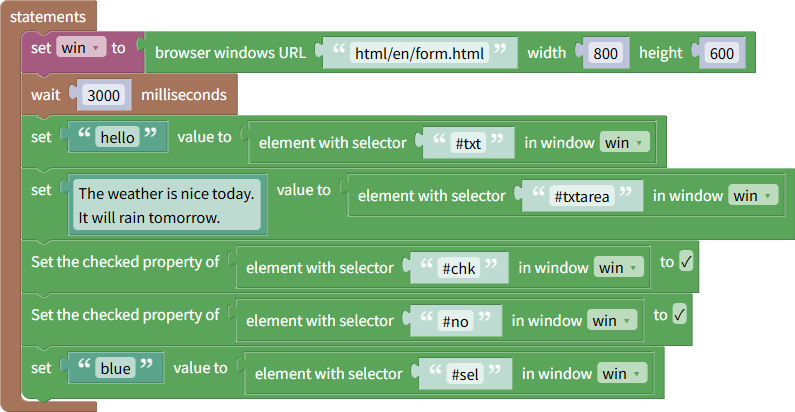
The following example shows how to change the value of a form input element.
You can download this example from here.
Additionally, the HTML file to open with this program can be downloaded from here.
Create a folder called "html" in the Tsumicky installation folder and place the HTML file in that folder.
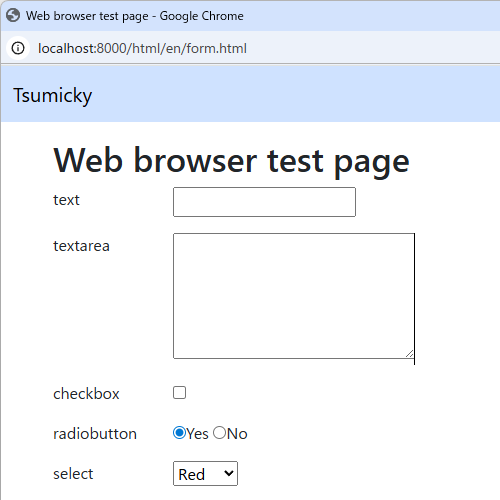
When you launch the program, the following form will be displayed.
Each element on the form, except for the radio buttons, is assigned an ID, as shown in the table below.
The yes/no radio buttons are also assigned IDs of yes and no, respectively.
The values of each element are rewritten programmatically based on these IDs.
| Element | ID |
|---|---|
| Text | TXT |
| Textarea | TXTarea |
| Checkbox | Chk |
| Select | SEL |
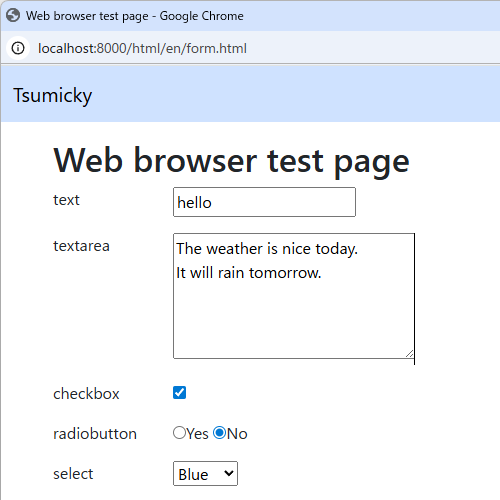
After 3 seconds of launching the program, the display will change to the following.