- Install
- Basic operation
- Basics of programming for electronic work
- Basics of programming for Excel
- Machine learning with scikit-learn
- Visualizing data with matplotlib
- Web programming
- Browser
- Basic program creation steps
- Web browser window operations
- Get an element and manipulating its contents
- Adding and Removing Elements
- Working with Forms
- Browser
- RPA programming
- Miscellaneous programming
- Reference
Adding and Removing Elements
You can add or remove elements from a web page displayed in a pop-up window.
Adding an Element
You can add elements to the following positions relative to a specific element on the web page:
- Immediately before the element
- Immediately after the element
- The first child element of the element
- The last child element of the element
Elements are added using the "add XX after XX" block.

The first parameter specifies the reference element.
The "after" drop-down list specifies the destination position.
The last parameter specifies what you want to add.
You can directly specify an HTML string for this parameter.
You can also specify the "element created from HTML in XX" block.

Remove element
You can remove an element from a web page using the "remove XX" block.
The "XX" parameter specifies the element to delete.

Example
The following example demonstrates adding and removing elements.
You can download this example from here
Additionally, the HTML file to open with this program can be downloaded from here.
Create a folder called "html" in the Tsumicky installation folder and place the HTML file in that folder.
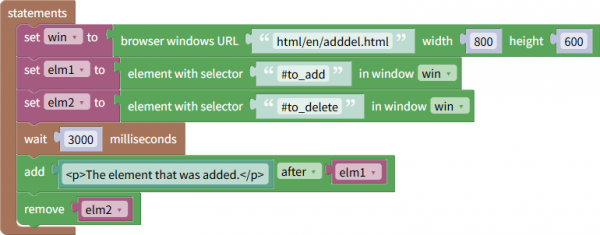
A new element is added after the element with the ID "to_add".
Also, the element with the ID "to_delete" is deleted.
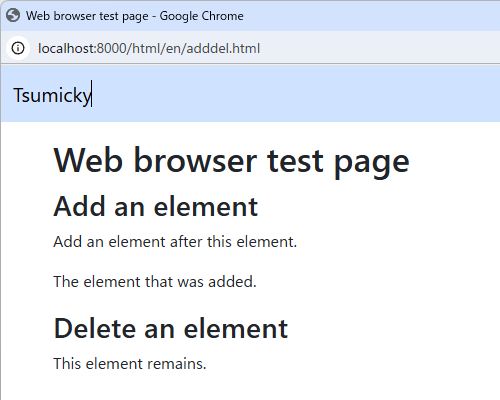
This is the display immediately after running the program.
The element with the ID "to_add" is assigned the ID "to_add".
Also, the element with the ID "to_delete" is assigned the ID "to_delete".
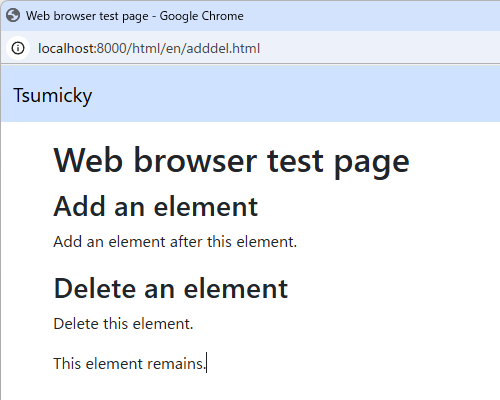
This is the display after 3 seconds have passed since the program started running.
An element has been added after the "Add element after this element" element.
Also, the "Delete this element" element has been deleted.